Bathroom planning
Shower Niche Tile Planning: Waterproofing, Set-Out & Edges
A niche combines framing, lining, waterproofing, drainage and highly visible tile cuts in one small part of the shower.
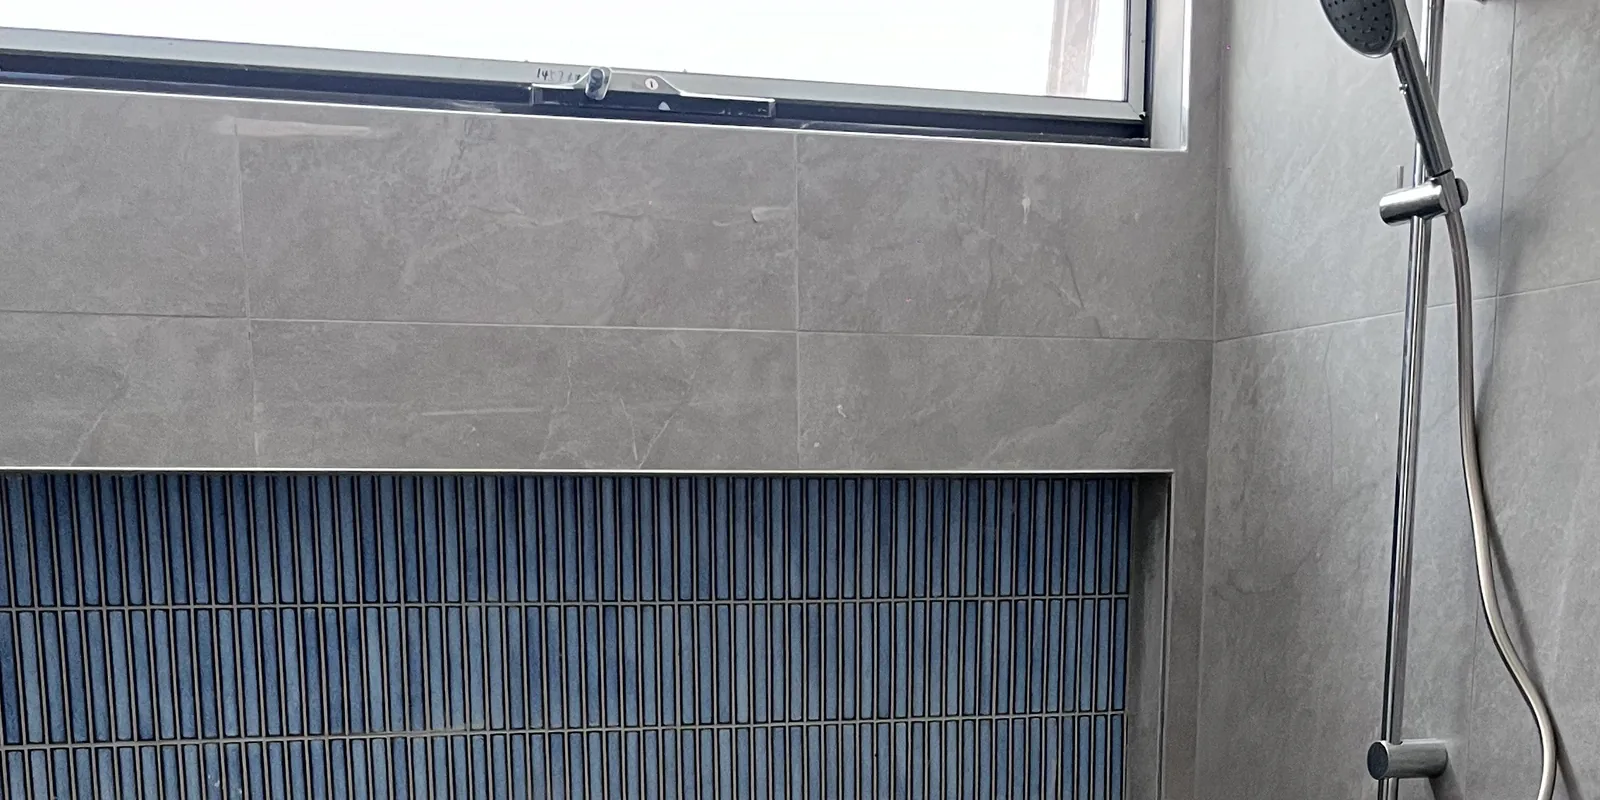
A shower niche looks like a decorative recess, but it brings several construction interfaces into one compact area. Framing, wall lining, waterproofing, shelf drainage, tile set-out and edge finishing all need to agree.
The safest time to resolve those details is before the wall is closed. Changing a niche after waterproofing or tile installation can affect concealed work and create compromises that are difficult to make neat.
Decide what the niche must hold
Start with use rather than a social-media reference image. Record the bottles and items the household actually wants to store, then allow for the finished tile surfaces and shelf arrangement.
Confirm whether the niche is intended as:
- one open compartment;
- a taller recess with a fixed shelf;
- a feature panel aligned to a selected tile module;
- a practical shelf with minimal visual emphasis.
These choices affect framing, waterproofed geometry and the number of exposed edges. A late request for a shelf is not only a styling change.
Coordinate position with structure and services
The proposed wall may contain framing, plumbing, electrical services or other constraints. Do not assume a niche can be placed anywhere shown on an elevation.
Before lining, coordinate its height and width with the shower fittings, screen, wall studs and any service penetrations. If the recess requires a change to the framing or another trade's work, that responsibility needs to be identified before construction continues.
Treat tile as the finish, not the waterproofing
The NCC wet-area provisions address water-resistant and waterproof construction at walls, floors, junctions and penetrations. A niche adds internal corners and a horizontal shelf within the shower exposure, so its background and membrane continuity matter before any tile is fixed.
AS 3740:2021 provides the Australian Standard pathway for waterproofing domestic wet areas. The project still needs a compatible, documented system and the applicable NCC pathway. Tile and grout do not replace that concealed wet-area work.
Plan the shelf to release water
Horizontal surfaces within a shower should not be treated as a perfectly level display ledge. Their formed geometry and finished tile need to direct water toward the shower rather than hold it against the back of the recess.
Discuss the shelf substrate, waterproofing, tile thickness and adhesive together. Checking only the framing angle does not prove the completed tile surface will behave as intended.
Set out the niche with the whole wall
A niche is most convincing when its lines belong to the surrounding wall. Compare its finished opening with the actual tile module and proposed joint width.
Review:
- whether major horizontal joints continue through or around the niche;
- the cut sizes at the top, base and both sides;
- how a feature tile or mosaic will finish at each edge;
- whether the shelf thickness creates a visible strip;
- the relationship to the mixer, shower rail and screen.
The priority is not always a full tile at every edge. It is a deliberate composition without accidental slivers or conflicting lines.
Choose the edge detail before ordering
External niche edges may use compatible trims, factory-finished edges, mitred tile or another project-specific detail. Each option depends on the selected tile, its thickness, the desired appearance and the installer's agreed method.
If the tile body differs noticeably from its face, an exposed cut can look very different from the sample. View the proposed edge treatment with the real tile before committing.
Protect completed concealed work
Once waterproofing is complete, avoid unplanned screws, shelves or accessories through the niche. Later trades need to know where fixing is permitted and how the wet-area system must be protected.
Photographs of the framed, lined and waterproofed niche can help the handover record, but they do not replace required project documentation or inspection.
Include the niche in the original bathroom scope
For quoting, provide the approximate position, desired internal use, tile product, feature-tile choice and preferred edge appearance. Mark whether the niche is already framed or is still a design request.
LITA Tiling can review it as part of a coordinated bathroom tiling scope and wet-area waterproofing scope. Keeping the niche inside the original brief is more reliable than adding it after the wall system is complete.
Sources and further reading
- Part 10.2 Wet area waterproofing - Australian Building Codes Board
- Waterproofing in houses - Australian Building Codes Board
- AS 3740:2021 - Waterproofing of domestic wet areas - Standards Australia
- AS 3958:2023 - Installation of ceramic and stone tiles - Standards Australia